 | |
| Here is the upper passenger side rad mount |
 |
| Lower passenger side mount |
 |
| And room behind the rad for dual shrouded fans. |
| |
| Here is the upper passenger side rad mount |
|
| Lower passenger side mount |
|
| And room behind the rad for dual shrouded fans. |


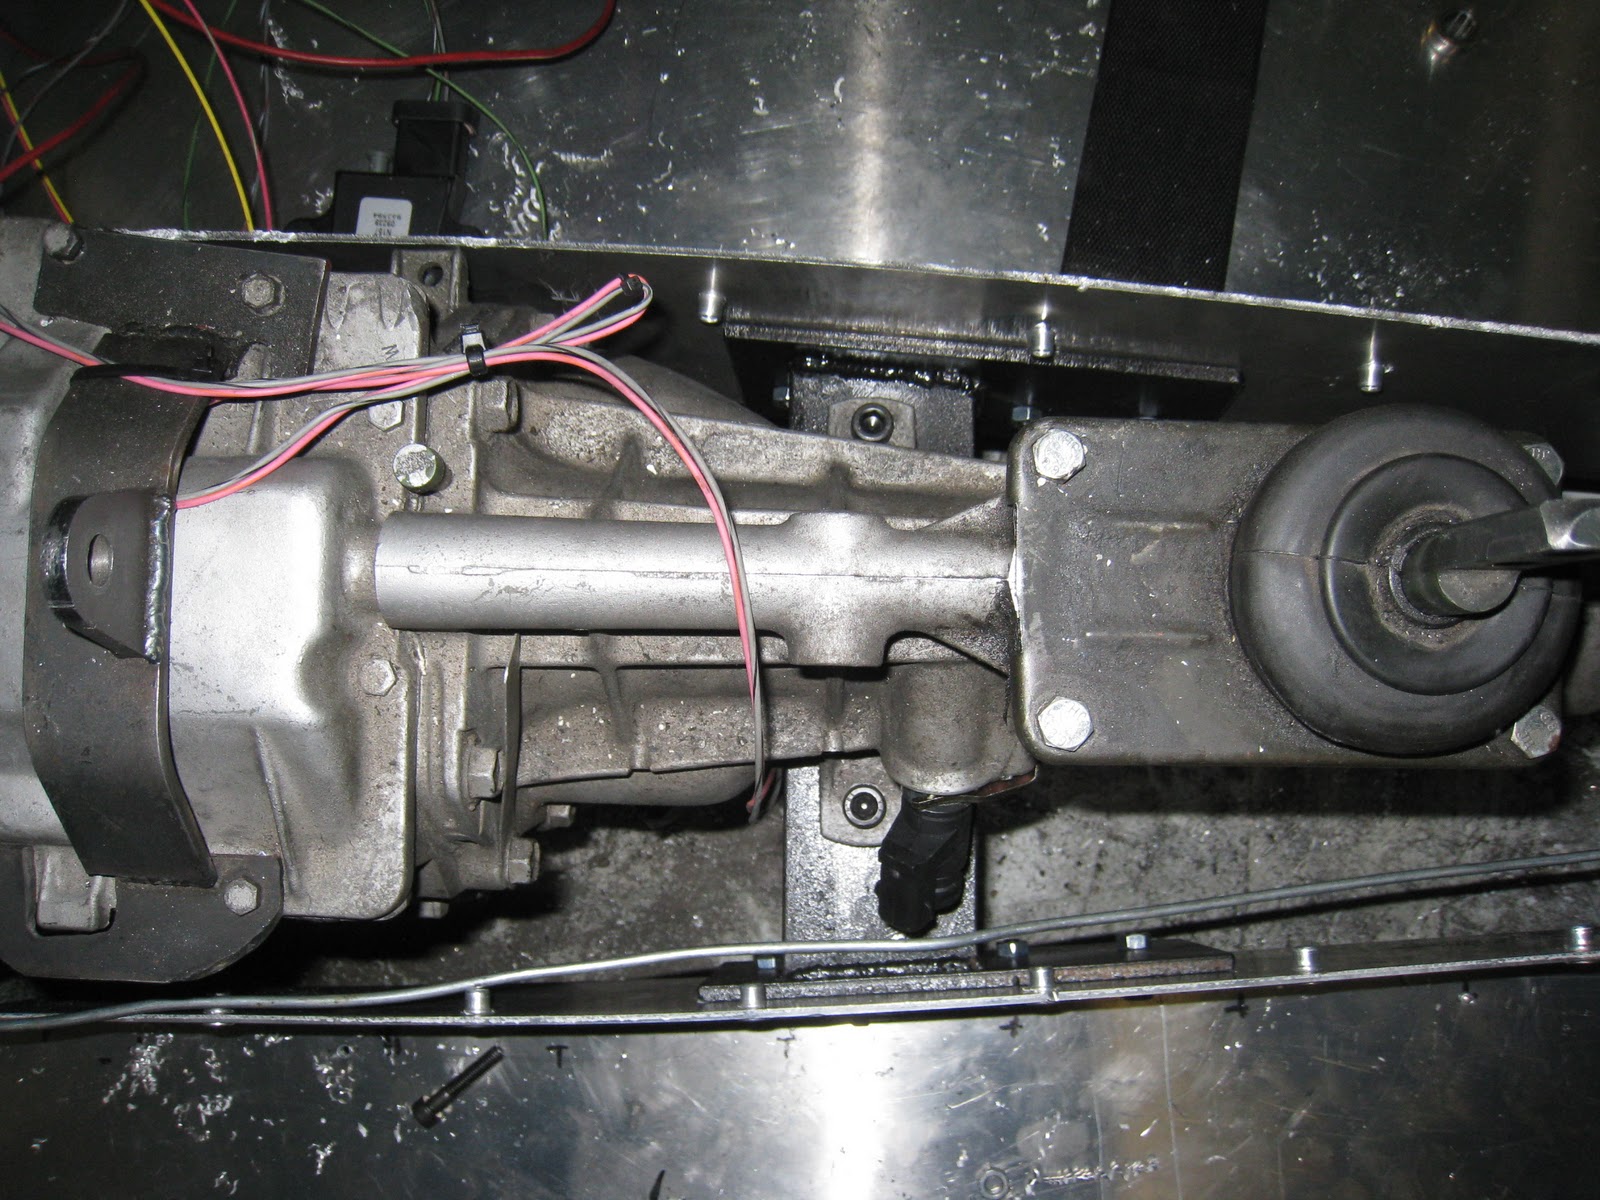 |
| The floor is so strong that I am using it to support the transmission. Here you can see the steel mount I have bolted between the driver and passenger floor. To be safe, I am going to seem weld the entire floor and add some gussets. |
 |
| I added a steel plate to add further strength and spread the load out a little bit. I will definitely have to keep an eye on the floor to make sure it's not buckling under the weight of the transmission. |
 |
| I ordered 1/8" aluminum sheet from a local supplier and had them bend the pieces for me. |
 |
| And did a bunch of trimming and test fitting until the floor fit nicely. I used threaded rivets so I could bolt the floor to the frame and the transmission tunnel to the floor. At the back of the tunnel you can just see the modified driveshaft loop which now also serves as the rear mount for the tunnel. |
 |
| I still have to add the vertical piece to fill in the rear of the floor, but you can see how I bolted it to the frame rail. |
 |
| A test fit of the seat revealed that I will have to make an angled mount to attach the sliders, it shouldn't be that difficult. |
 |
| In this picture of the car in action, you can see how much airspace there is between the floor and the ground. This was a mistake on my part, I built the new floor higher than the original MGB floor and I decided to correct the mistake. |
 |
| I cut out the whole floor, which was painful because so much work went into making it in the first place. The new floor will be lighter, lower and look better. |
 |
| I also bolted the upper intake on and attached the wiring harness to some of the sensors/injectors. |
 |
| And I am attempting to build fender flares out of aluminum. They should look pretty good when completed. |
 |
| The V12 carbs used a low pressure fuel pump but the V8 uses a high pressure EFI pump. I removed the old pump and mounted this EFI pump behind the fuel cell. I would have liked to mount it lower but it would interfere with the diffuser. |
 |
| And I mounted a new fuel filter along the frame rail. Notice the fancy clip-on connectors just like the factory uses. The filter is going to be around 5 inches from the exhaust pipe and I hope heat isn't going to be a problem. If it is, I'll construct a heat shield. |
 |
| After the fuel filter, the lines (pressure and return line) run inside the frame rail and pop out just behind the battery. |
 |
| And attach to the fuel rail and regulator. |
 |
| Don't know why this pic uploaded sideways but here is the section on the drivers side that needed to be cut out. |
 |
| And the new section is welded in, I still have to add a little front piece and weld the underside. |
 |
| I debated what to do about motor mounts but finally decided to run 2" square tubing from the stock location on the block out to the frame rails. This is the passenger side. I learned from the V12 that motor mounts sticking into the engine bay make it more difficult to remove the engine, so these ones bolt to the frame using grade 8 bolts.. |
 |
| There is no cushion between the frame and the engine, they are solidly bolted at both ends |
