So, the great news is that the car has a noticeably improved throttle response with the new intake manifolds and based on my short drive, I'm confident it will make more power, too. The bad news is that now that I covered the lightening holes in the frame with aluminum, heat is transfering to the fuel line and it's over 150 degrees by the time it gets to the engine compartment, and gets vapor locked after a short period of time. Also, fuel spilled on the cam covers and destroyed the paint so the newly installed intakes, carbs and cam covers all had to come off so I could repaint the cam covers with something a little tougher. I'm going to cover the fuel line where it runs along the door sills with insulation and hopefully that will solve the heat problem. If not, I will run a return line to the fuel tank. Here's a short video of when I first started it.
First start-up with new manifolds
Thursday, April 28, 2011
Wednesday, April 27, 2011
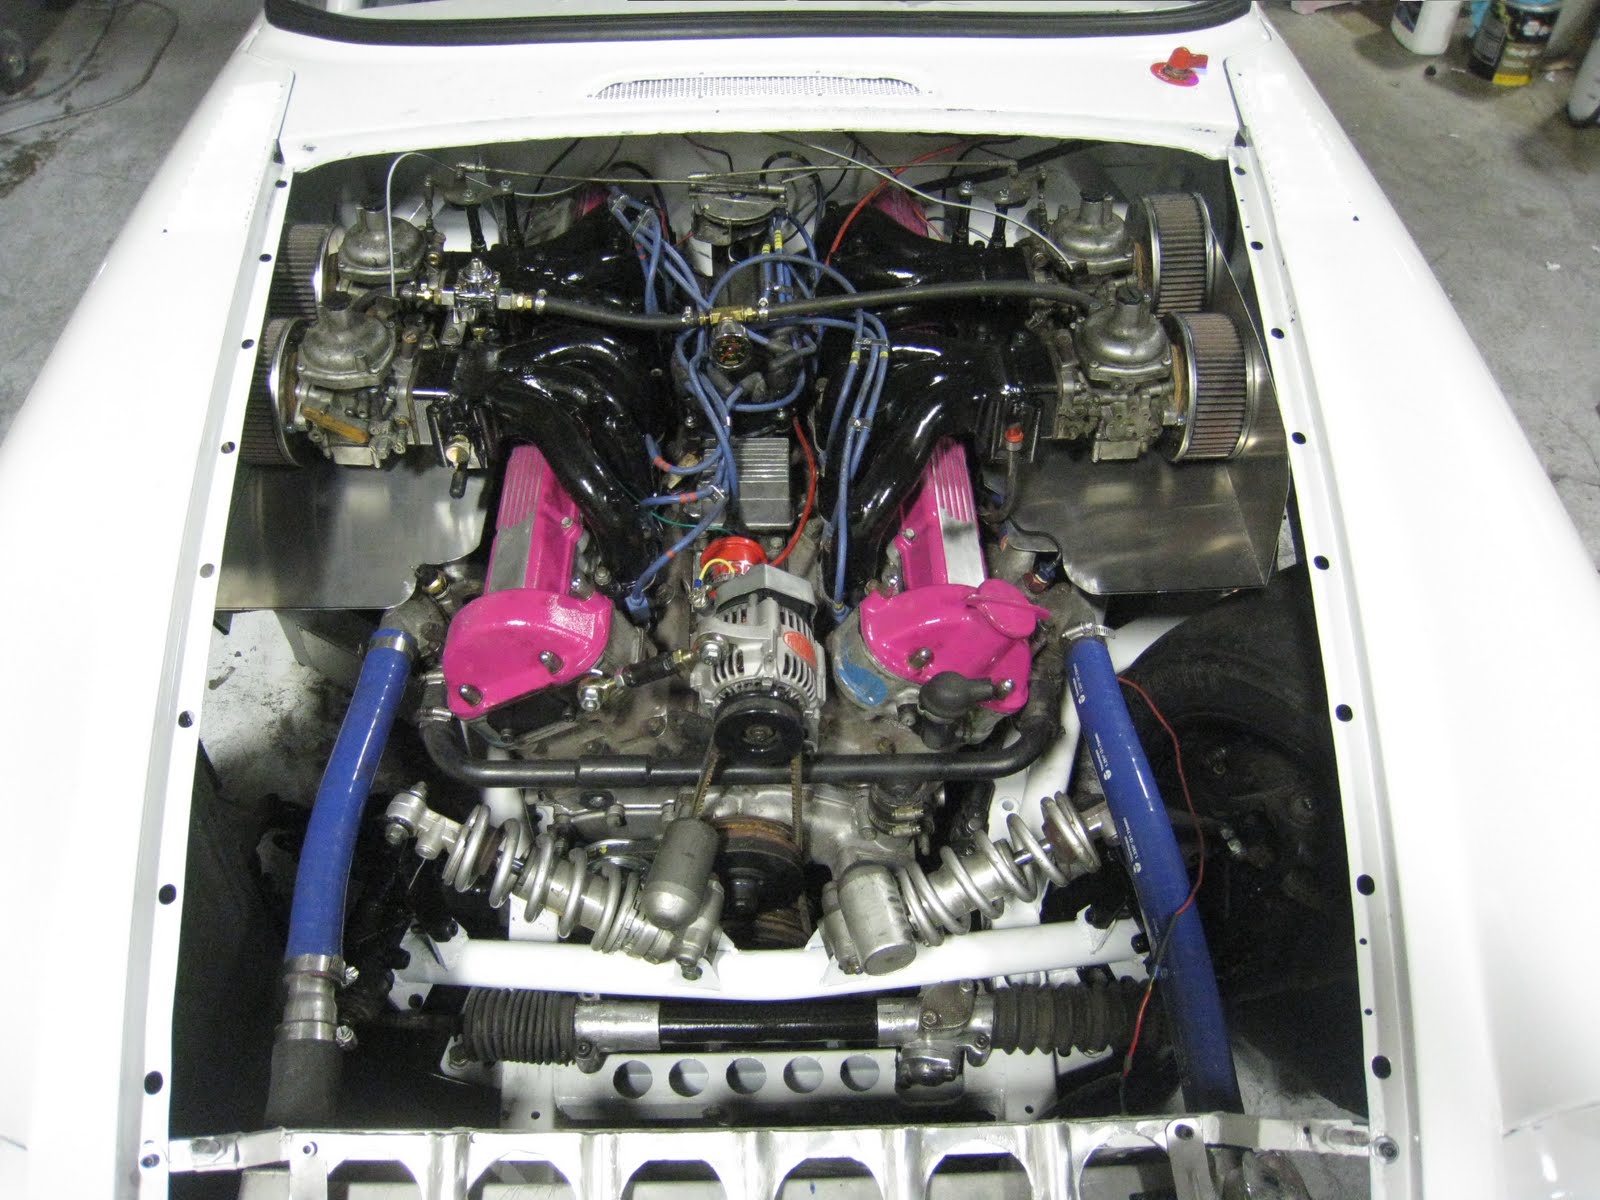
Heat and splash shields
I had concerns about water flooding the air cleaners and heat from the exhaust manifolds being sucked into the engine so today I made heat/water shields. I took some measurements and cut and bent some aluminum then trimmed anything that was in the way. Of course, when I get my dream ram air system made, these will get yanked out. Notice also that the throttle linkage has been modified and re-installed and the coil and fuel pressure regulator have been moved to better locations.


Tuesday, April 26, 2011
Polycarbonate windows and tow hook
 |
| I had another racecar which had polycarbonate windows which were bolted in, and I didn't like the look. I decided to use MGB window seals to hold in the 3/16ths thick polycarbonate windows in this car. They were an absolute bear to get in, I mean really difficult. The front window was the worst, the back one less so. |

 |
| Notice the sunroof is now a polycarbonate panel instead of a welded piece of metal |
 |
| I needed a tow hook and had nothing solid to attach it to, so I made up this extended reach tow hook |
 |
| When needed, it slides under the splitter and through a slot in the air dam mount which keeps it from moving side to side. Then it slides into this bracket and is held in with a pin, ready to pull the car. |

Thursday, April 21, 2011
Spliiter end plates
The splitter is not allowed to extend beyond the bodywork so to make it more effective, an end plate is added to keep air from spilling over the side of the splitter.
 |
| I started with making a template out of construction paper |
 |
| Then transfered the shape to aluminum and cut it out with the plasma cutter |
 |
| With a tab bent under and behind the endplate, I could rivet it to the splitter and bolt it to the spoiler for easy removal |

Exhaust shield
 |
| I am concerned about heat from the exhaust discoloring or bubbling the paint so I decided to build shields. I started by cutting a template out of construction paper |
 |
| Then transfered the shape to stainless steel. I am using stainless because it gets a cool pattern when it gets really hot |
 |
| I cut out the pattern with the plasma cutter |
 |
| Then gave it a quick sanding with 320 grit paper |
 |
| I'm not sure the stainless will ever get hot enough to discolor but I like the look so I helped it along a little |
 |
| Then riveted it on |
 |
| Looks cool, right? |
Intake manifolds modification
 |
| The aluminum block on the left needs to be attached to the intake on the right |
 |
| This beautiful piece took 18 hours of computer modeling and a bunch more time on a CNC mill |
 |
| This is how it will be mounted with the carb |
 |
| JRS manufacturing http://www.jrstephenson.com/ did a great job welding billet aluminum to cast aluminum. It's very difficult to join these two materials together without cracking the cast aluminum but somehow they did it. |
 |
| I used a die grinder to clean off the seam left over from the casting process |
 |
| And I tapped and plugged the air injection ports |
 |
| The centre still needed to be opened up |
 |
| Which I did with a hole saw and die grinder |
 |
| After a coat of paint, they look pretty good |
 |
| I was much relieved to find that the hood will close without being modified |
Monday, April 18, 2011
Mesh Grille modification
 |
| Here is the stock grille with it's vertical bars. Also note the splitter struts |
 |
| The grille in it's stock form |
 |
| The vertical bars are a pressed aluminum piece helded on by rivets |
 |
| Here it is removed from the grille housing |
 |
| Once the bars were out, I used the plasma cutter to zip them all off and use what's left as a surround for the mesh |
 |
| The mesh was riveted to the grille and bolted back on the car. The bumper isn't installed yet. |
 |
| I also riveted mesh into the cowl vent |
Saturday, April 16, 2011
Reassembly-splitter, spoiler, fenders
 |
| I took some aluminum channel and drilled holes in it |
 |
| Then cut it into pieces |
 |
| Cleaned them up a little by buffing the edges |
 |
| And voila', a mount for the spoiler bracket is made, ready to rivet on. |
 |
| I bolted the wheels and fenders on |

Friday, April 15, 2011
Reassembly-Seats, shifter and interior panels
 |
| The seats and belts are in-it's a tight fit. |
 |
| The fuel filler hoses are on, fuel line plumbed and panels riveted in. |
 |
| Rear spoiler is on. I had to trim it in a few places to keep it from scratching the paint. |
 |
| The shifter is on and the 11 holes I drilled in the rod brings the total number of lightening holes drilled in the car to 429! |
Thursday, April 14, 2011
Reassembly-heat shield, radiator and taillights
 |
| I was concerned about heat from the sidepipes bubbling the paint on my door sills and doing bad things to the silicone I sealed the aluminum plates on with so I got Hushmat heat reflective tiles from wwwfasttoys.net and glued them on where the sidepipes go. The adhesive on the tiles is rated for 400 degress, hope that's enough. |
 |
| I cut a bunch of holes in my top radiator mount and bolted the rad in. |
 |
| I took some aluminum mesh and riveted it in the opening where the taillights used to be. I went through the trouble of making aluminum trim rings but it looks racier and better without them. Air in the rear wheelwells will have an easy exit out these vents. |

Subscribe to:
Posts (Atom)