Drove it around the track today, it was awesome!!!! Video: http://www.youtube.com/watch?v=_YJVj_tRh0E
It could not have been better. The power was instananeous, the handling was predictable and balance was perfect. The rear tires are R25B and the front R45B so as I got some heat in the rear tires from giving it a little gas, the car became a little understeery. I did not like the feel of the clutch and pulled the transmission off to adjust the throwout bearing and it's better now. I'm seriously considering moving the main roll hoop back to get more leg room, but that's a lot of work.
Friday, January 28, 2011
Wednesday, January 26, 2011
Air Cleaners
I ordered 4 round K&N air filters for the Stromberg 175CD carbs but when they arrived, I discovered that the roll cage interferes with the rear air cleaners. I decided to build my own housings out of aluminum using 2 oval K&N air cleaners.
 |
| I cut two pieces of plywood in the profile of the air cleaner to use as a template |
 |
| Then cut some sheet aluminum a little larger than the template |
 | ||
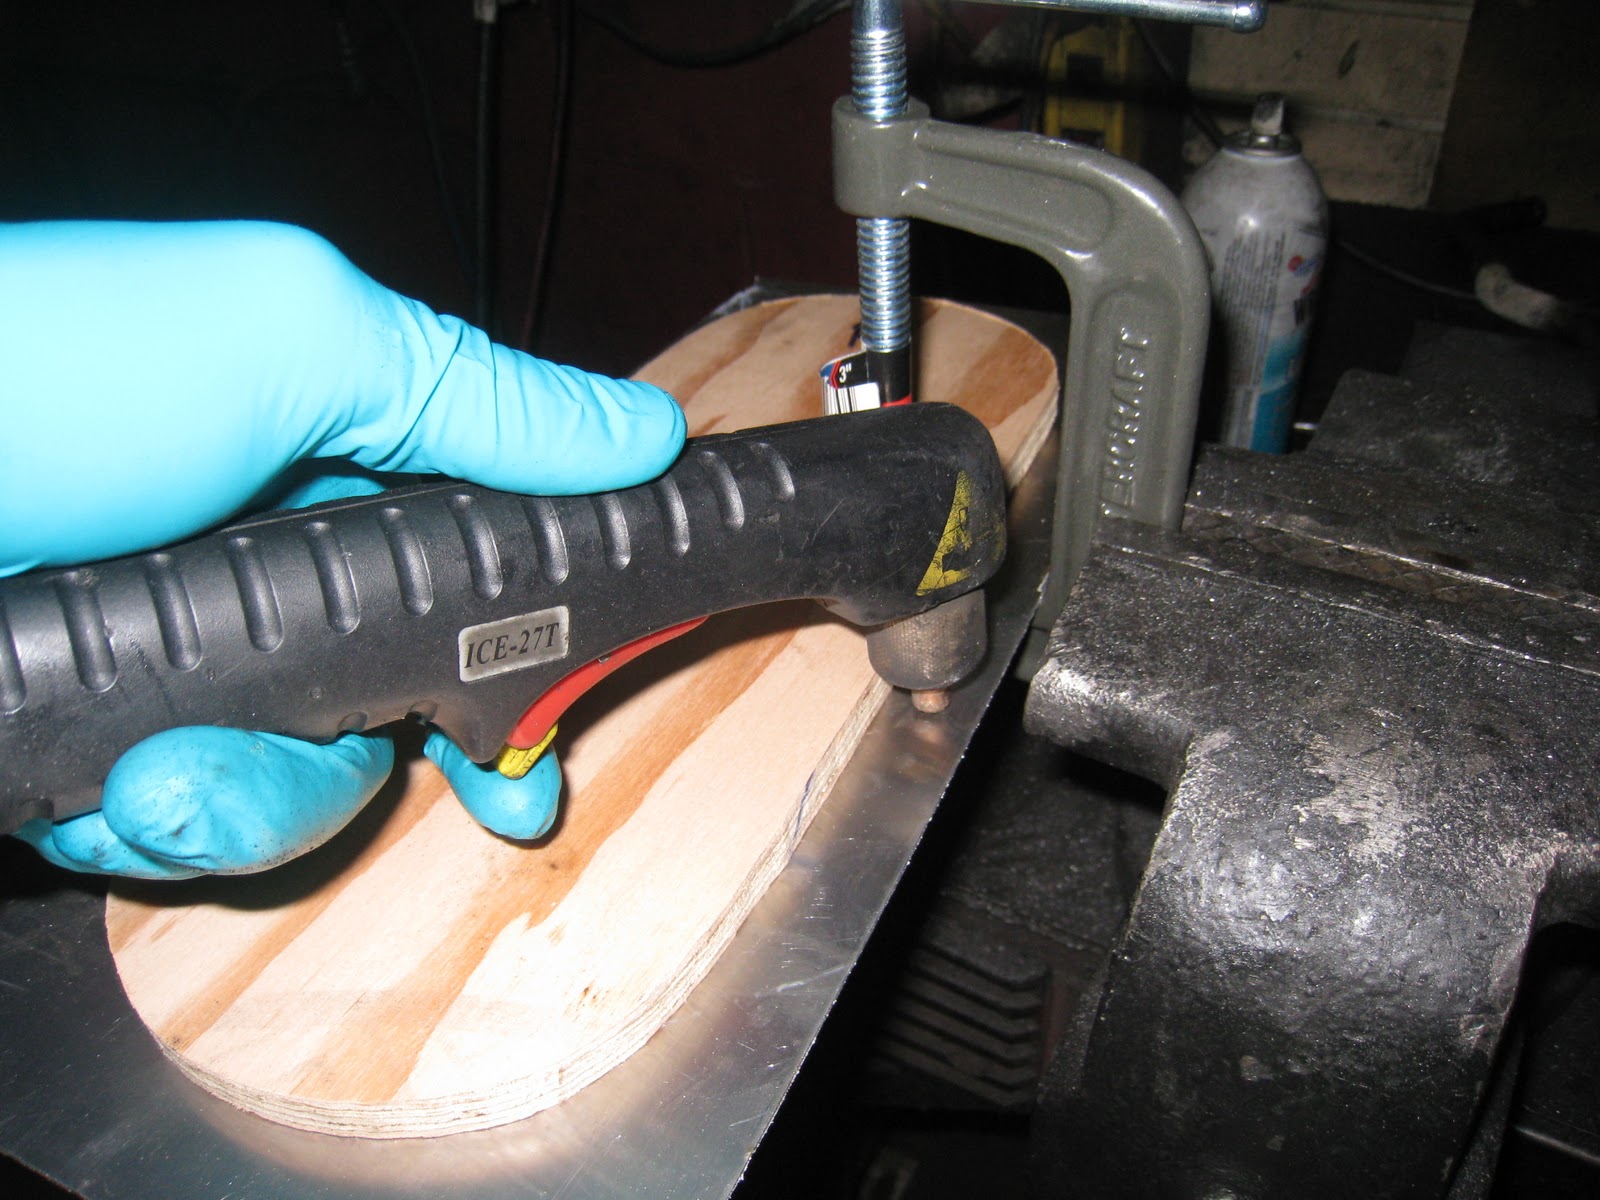
I clamped the aluminum between the plywood pieces
|

 | ||
Then was left with this, which needs some cleaning up but is the start of an air cleaner housing
|

 |
 |
I went with my original plan of 4 round air cleaners. The one on the right had to have it's rear mounting plate modified to move the air cleaner up and clear the tube. I will eventually be changing to something that won't get flooded by splash from the tires, but this will work for dry days. |
Release Bearing
The transmission requires a hydraulic release bearing so I took the necessary measurements and ordered the Tilton parts through http://www.fasttoys.net/.
 |
| This machined aluminum piece bolts in place of the bearing holder on the T5 |
 |
| Then the hydraulic release bearing bolts on. It has a threaded collar and is adjusted so that the bearing almost touches the fingers on the pressure plate. |
Monday, January 24, 2011
Steering
Steering is critical to good handling and I am just now learning about the effects of toe, camber, Ackerman, etc and how to change these things. There is still lots to learn but I have to start somewhere.
 |
| The front suspension I am using is from a 1967 Jaguar XJ6 and as you can see in this picture of the drivers side suspension, the steering rack attaches to an arm that is behind the assembly. |
 |
| Here is another view of the arm. I cannot use it because I have no room to fit a steering rack behind the suspension because the V12 block is in the way. |
 |
| I discovered that the MGB steering arm will bolt directly to the bolt holes left by removing the Jag steering arm. Here it is bolted in place and sharing a bolt with the Wilwood calipers. |
 |
| Here is a better picture of the MGB arm with the tie rod bolted on. Initially, the tie rods were at an upward angle which would cause bump steer problems. By flipping left side to right and bolting the tie rods in from the bottom, the rods are parallel to the control arms so bump steer will be minimal. |
 |
| Next up is steering angle. I did a rough alignment to zero toe then measured how many degrees the wheel turned. The wheels turn 25 degrees in either direction, which is probably enough for all but the tightest manuever. Here you can see the limiting factor, which is the tie rod running into the suspension upright. |
 |
| I trimmed the offending upright and because there was a seam, I welded it back up. Now the wheels turn 32 degrees in either direction, good enough for the pivot cones we have to deal with locally. |
 |
| Next thing I have to sort out is Ackerman. When turning, the two tires in the inside of a turn drive through a smaller arc than the outside tires. In the back, the differential deals with this by allowing one tire to spin faster than the other. On the steering tires, you want the inside tire to turn a little sharper than the outside tire because the arc it is driving through is smaller. In this picture you can see that my steering rack is moved forward quite a bit, and with my current steering arms, I have no Ackerman. In other words, my front tires turn exactly the same amount and stay parallel to each other at all times. I can compensate for this by giving it a little toe-out, which will make the tires drive different arcs when I am turning, but this could also wear out tires quicker and make the handling "darty". |
 |
| Another fix is to move the steering rack back, like in this picture. I have not done this yet but I re-checked the steering angle with the rack moved back and the tie rods will interfere with the uprights again, reducing steering angle to 24 degrees in either direction. Stay tuned, I may notch the upright further and move the rack back. |
 |
| Update: I moved the steering rack back 2 inches which forced me to re-route the oil line under the engine. Now the steering rack is almost straight across. |
 |
| I had to notch the upright pieces but now I am getting 28 degrees of steering angle and finally have Ackerman!! |
Friday, January 14, 2011
Oxygen Sensors
I once had a Porsche 911 with Weber IDA carbs. I spent many, many hours attempting to tune the carbs by making tweaks then taking the car for a drive and making more adjustments. The car was powerful but it never ran perfect and I always thought that it was as good as it was going to get, until I put it on a dyno. Brian from Wall's Rod and Custom suggested I put wide band oxygen sensors on the car so we could see what was going on with the mixture while on the dyno. We quickly discovered that the left and right carbs were not syncronized and that there was a large vacuum leak from the brake booster. I corrected all the problems and using the oxygen sensors and dyno, I was able to get the jetting perfect. Not only did the car pick up a bunch of horsepower and torque but it suddenly became to most driveable carburetted car I have ever driven. The MGB has 4 carbs so I welded oxygen sensor bungs in each of the 4 pipes coming off the manifolds so we will be able to see precisely what is going on with the mixture on each carb.


Carb Rebuild
I ordered 4 Stromberg 175CD rebuild kits from Moss Motors and took the carbs off the engine. I am familiar with Webers but not Strombergs so I followed the directions from this site: http://www.buckeyetriumphs.org/technical/technical.htm
 I found a number of problems including wrong float levels, plugged temperature comensator valves and torn bypass valves. This picture shows one of the temperature compensator valves, the circular area in the middle is a hole that is supposed to be open but it was plugged with soot or sludge. I also discovered that vacuum lines were incorrectly routed, making the bypass valves non-functional. This may have been a "fix" done by a mechanic many years ago because two of the four bypass valves were torn. The car starts and settles down to a nice idle almost immediately now, where before it had to be up to operating temperature before it would run without the choke on.
 |
| I should have taken more pictures of this process but I didn't and the carbs are all back together and on the car now. |

Friday, January 7, 2011
Temperature sensors
The oil temp, water temp and electric fan sensor all use a 1/2" NPT size hole and the engine had none that size so I bought the right drill bit and tap to make my own. Here I am tapping the bung I am using for the oil temperature gauge

Video of the coolant hose that popped

 |
| There was a nice thick area on the drivers side of the engine, close to the thermostat housing, where I could drill and tap a hole for the electric fan sensor |
 |
| There was already a hole on the passenger side but it was too small, so it got drilled out and tapped for the coolant temperature sensor |
 |
| I had to remove the oil pan to weld a bung for the oil temperature and was pleasantly suprised how nicely baffled the pan was |
 |
| And here is a shot of the pickup, notice all the baffles to keep oil where it's supposed to be. |
 |
| Here is the bung before welding |
 |
| And installed on the car |
Subscribe to:
Posts (Atom)