Monday, May 9, 2011

Corner weight and alignment

It was time for a final balance and alignment so I brought the car home, where I have a laser alignment machine I picked up for a few hundred bucks from a garage that was upgrading. But first I needed to corner balance the car and for that I borrowed my car club digital scales. I took 170 lbs of ballast and added it to the drivers seat to simulate my weight. I followed the advice in this Grassroots Motorsports Article: http://grassrootsmotorsports.com/articles/understanding-corner-weights/

I inflated the tires to 30 psi to because an under or over inflated tire will alter the results. The sway bar can throw off your results as well so it needs to be disconnected.

I put the car on the scales and bounced it up and down to get the suspension settled. The scales have a cross weight function and all I had to do was adjust the left rear and right front pushrods to get the perfect 50% crossweight.

Here is a pic of the scales display. The bottom right number is the percentage of crossweight, a perfect 50%. Also note the individual weights of the 4 corners. I'll save you from getting out the calculator, the total weight is 2353 lbs and the front/rear weight balance is 53%/47% including 170 lb driver.

Then I attached the laser alignment heads to the 4 wheels. The heads have a runout function where you rotate the wheels so the heads can work out if your wheels are bent or the clamps are not perfectly centered.

Yup, it's old and beat up but I had it calibrated and it's accurate.


The car is so easy to align. I just had to add a couple of shims on the top A-arms to get -2 degrees camber then spin the tie rods to adjust toe. Also, it's amazing how close I got the rear axle centered using only a measuring tape. All I had to do was rotate the passenger side bars half a turn each to square the diff. The final alignment numbers are -2.17 camber and .14" total toe out in the front and zero camber and toe in the back.

Thursday, May 5, 2011

Dyno session number 2

The only change I made to the engine was the new intake manifolds. The car made 30 more horsepower than before, so I'm pretty happy. I advanced the timing as far as I could and ultimately the car made 290 hp at 6023 rpm and 288.5 ft/lbs at 3765 rpm. The hp peak is 600 rpm higher and the torque peak is 400 rpm lower than before. Here is the video: http://www.youtube.com/watch?v=ffuksaN2LDI

Tuesday, May 3, 2011

Graphics

We tossed around many ideas for graphics and wanted something unique and tied into the Britishness of the car or the Jaguar V12. Briget sketched out the leaping Jaguar on the side of the car and it occured to her that the Jaguar is also called a Panther, and it wasn't a big leap to "Pink Panther" so here is the graphics of the car. There are a few details missing but you get the idea.


Monday, May 2, 2011

Shifter boots

Because of the unique shifter mechanism in the car, I need two shifter boots. I ordered some universal Mr.Gasket boots from http://www.fasttoys.net/ and today installed them.
I started by removing the linkage and holding the boot over the hole to figure out where to drill the holes.

Once the holes were drilled, I used threaded inserts so I could bolt the boots in

And both boots are installed and IMO looking good

Thursday, April 28, 2011

It's running again

 So, the great news is that the car has a noticeably improved throttle response with the new intake manifolds and based on my short drive, I'm confident it will make more power, too. The bad news is that now that I covered the lightening holes in the frame with aluminum, heat is transfering to the fuel line and it's over 150 degrees by the time it gets to the engine compartment, and gets vapor locked after a short period of time. Also, fuel spilled on the cam covers  and destroyed the paint so the newly installed intakes, carbs and cam covers all had to come off so I could repaint the cam covers with something a little tougher. I'm going to cover the fuel line where it runs along the door sills with insulation and hopefully that will solve the heat problem. If not, I will run a return line to the fuel tank. Here's a short video of when I first started it.
First start-up with new manifolds

Wednesday, April 27, 2011

Heat and splash shields

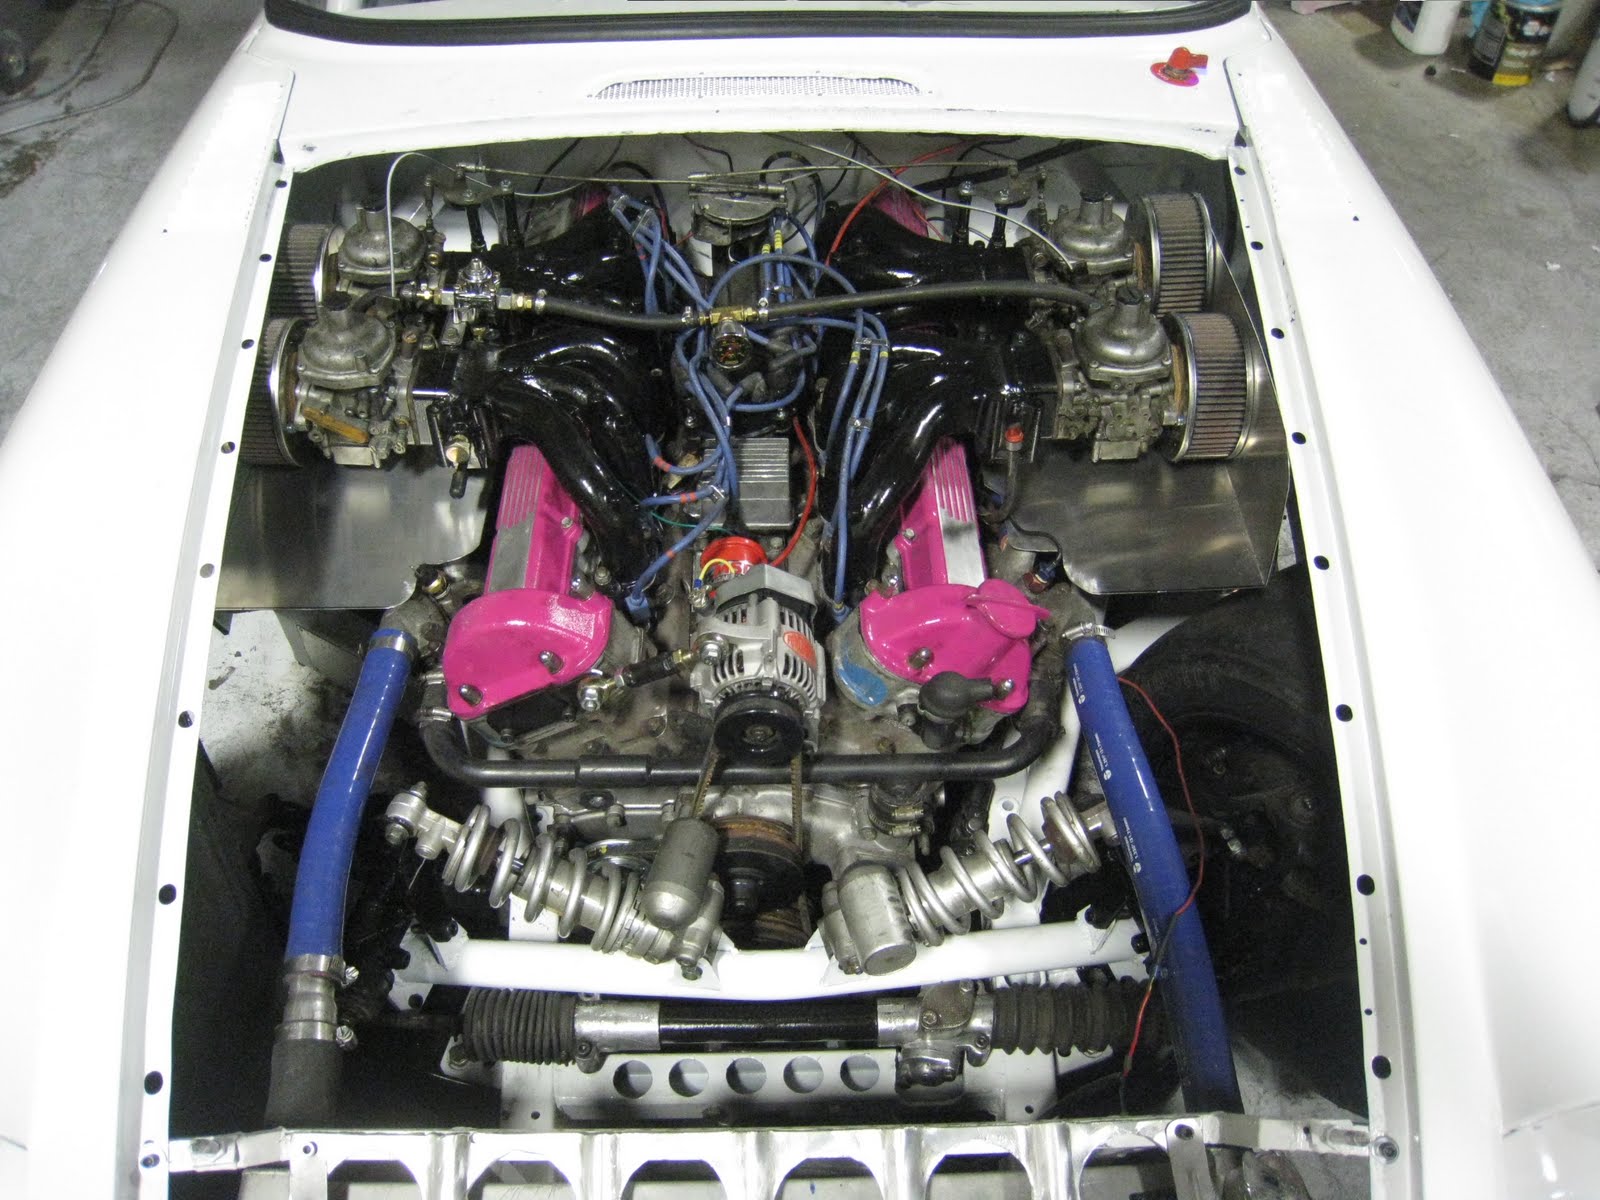
I had concerns about water flooding the air cleaners and heat from the exhaust manifolds being sucked into the engine so today I made heat/water shields. I took some measurements and cut and bent some aluminum then trimmed anything that was in the way. Of course, when I get my dream ram air system made, these will get yanked out. Notice also that the throttle linkage has been modified and re-installed and the coil and fuel pressure regulator have been moved to better locations.


Tuesday, April 26, 2011

Polycarbonate windows and tow hook

I had another racecar which had polycarbonate windows which were bolted in, and I didn't like the look. I decided to use MGB window seals to hold in the 3/16ths thick polycarbonate windows in this car. They were an absolute bear to get in, I mean really difficult. The front window was the worst, the back one less so.


Notice the sunroof is now a polycarbonate panel instead of a welded piece of metal

I needed a tow hook and had nothing solid to attach it to, so I made up this extended reach tow hook

When needed, it slides under the splitter and through a slot in the air dam mount which keeps it from moving side to side. Then it slides into this bracket and is held in with a pin, ready to pull the car.